Tag: Vancouver landscaping

  • Watering Can: The Tool That Shapes Your Garden

    Watering Can: The Tool That Shapes Your Garden

    Whether you’re new to gardening or have experience, the watering can is probably your most frequently used tool. But how often do we think about how it’s designed—and why that matters? If you’re looking for one that lasts, feels good to use, and actually helps your plants thrive, start here.

    What Material Is the Watering Can Made Of?

    The material of a watering can affects more than its appearance—it changes the weight, durability, and even the feel in your hands.

    Plastic is lightweight, affordable, and often comes in a range of sizes. It’s a great everyday option for indoor use or small outdoor patios. The downside? Cheaper plastic can crack under UV exposure or cold weather—something to keep in mind in Vancouver’s climate where the seasons shift quickly.

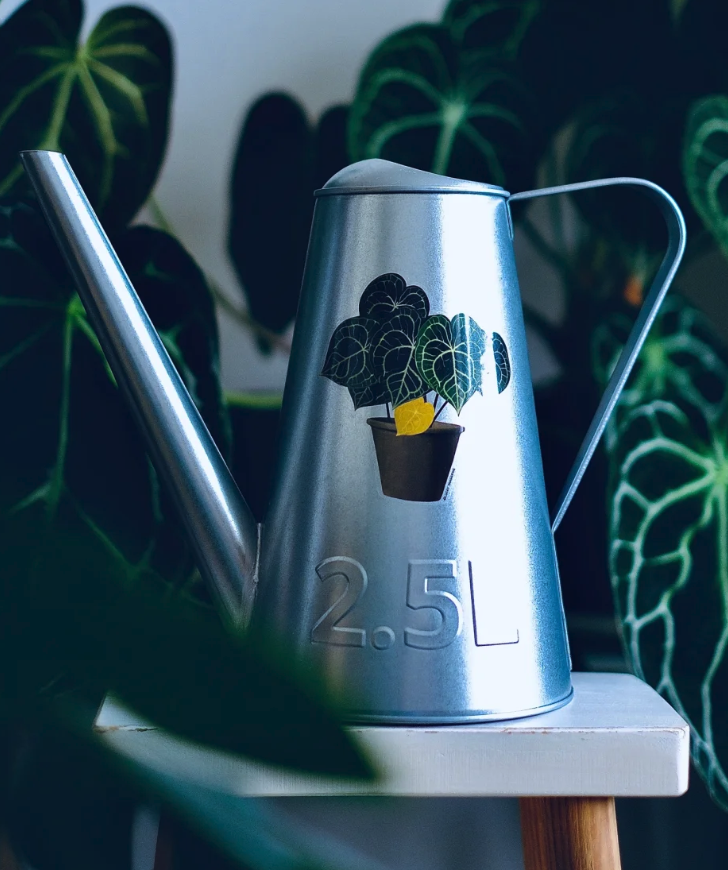
    Metal, especially galvanized steel or stainless steel, is more durable and usually considered more attractive. A well-made metal watering can with a powder-coated or rust-resistant finish can last for years. However, they can get heavy when full and may dent if dropped. For serious gardeners, metal offers that long-term value, especially if you’re watering a large number of plants daily.

    Ceramic or decorative cans are mostly meant for indoor use and light watering. They’re beautiful—but fragile. Think of them as part tool, part home decor.

    What Is the Capacity of the Watering Can?

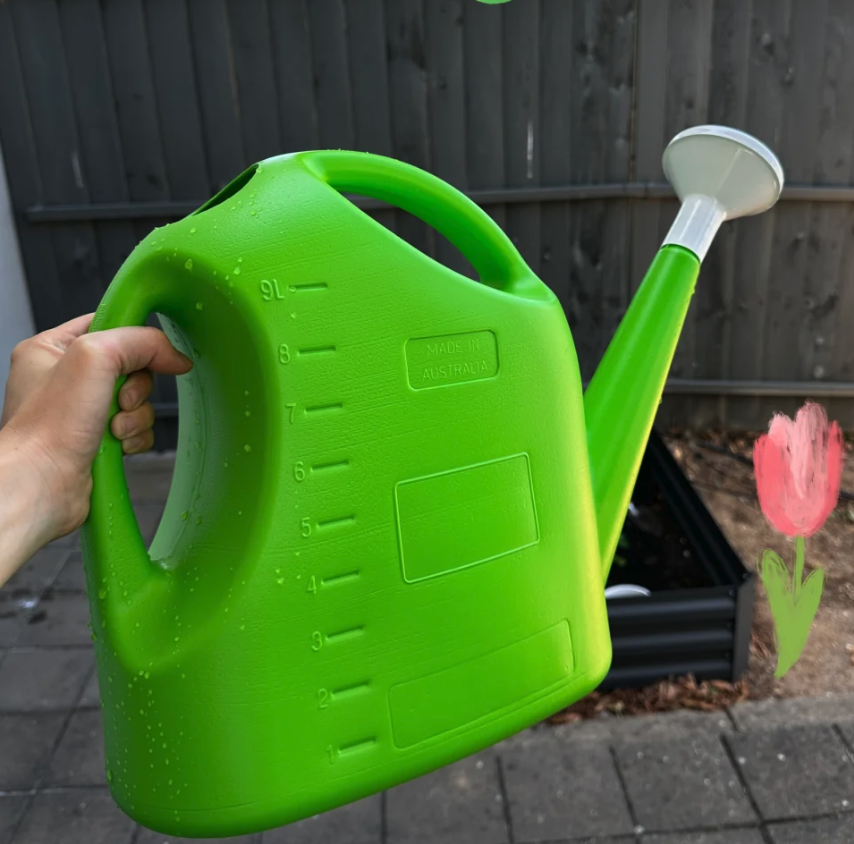
    Capacity affects more than just how much water you carry—it also changes how efficient and enjoyable the task becomes.

    A 2-gallon can might seem ideal because it cuts down on trips to the tap. But it’s also heavy. Carrying that much weight repeatedly can cause fatigue, especially if you’re watering hanging baskets, raised beds, or rooftop plants.

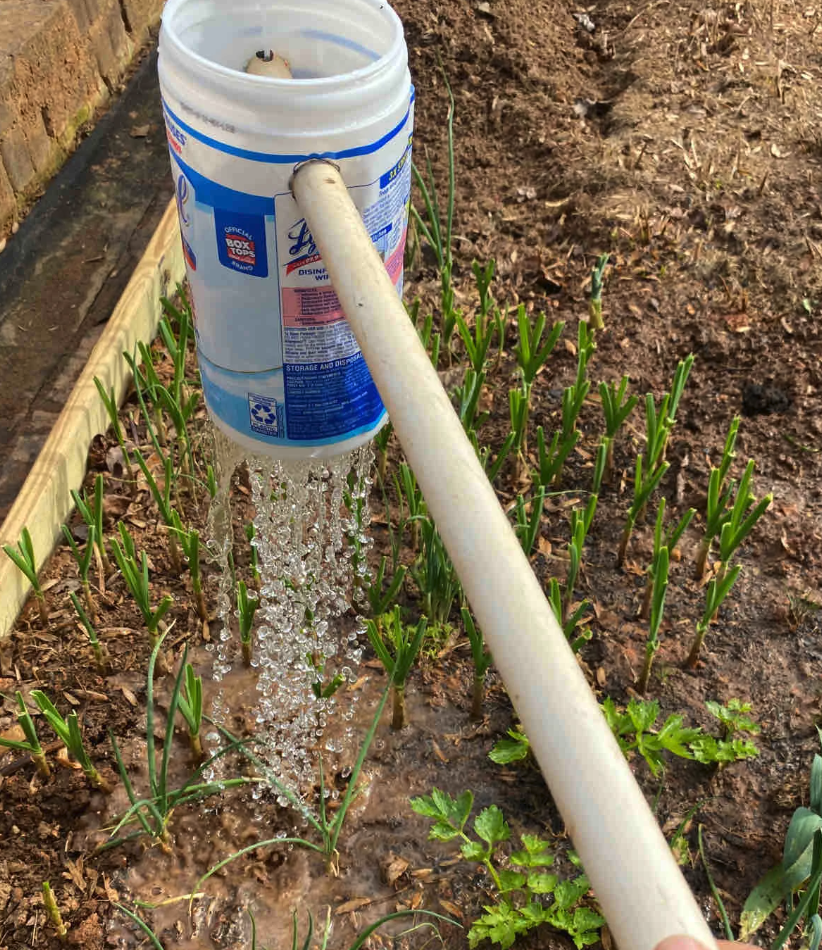
    On the other end of the spectrum, a 1-gallon can or smaller is much more manageable and lets you water with precision. This size is ideal for houseplants or balcony gardens where overwatering is a common concern. If you’re nurturing delicate foliage or plants that require different amounts of water, a smaller can helps you stay in control. Here is a simple DIY Watering can that works:

    The best practice? Use a large can for broad outdoor areas and a compact one for houseplants or seedlings. Some gardeners even keep both. Consider the layout of your garden and how often you water—capacity should serve your rhythm, not fight it.

    Does the Watering Can Have a Detachable Spout?

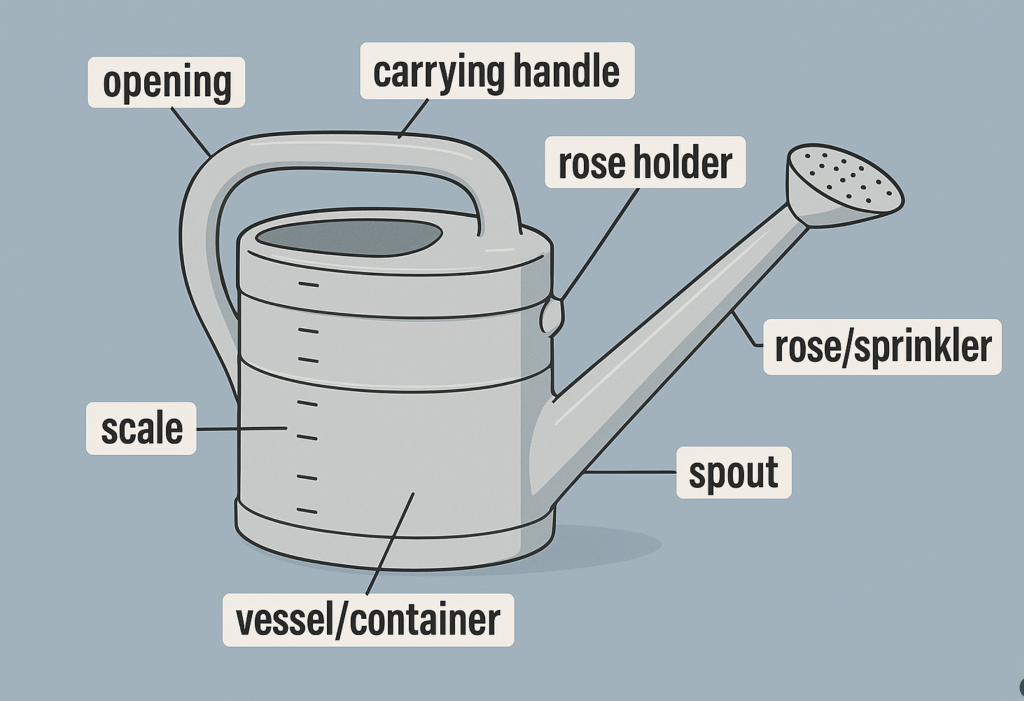
    A detachable spout—also known as a rose attachment—is more than a design flourish. It can turn your watering can into a dual-purpose tool.

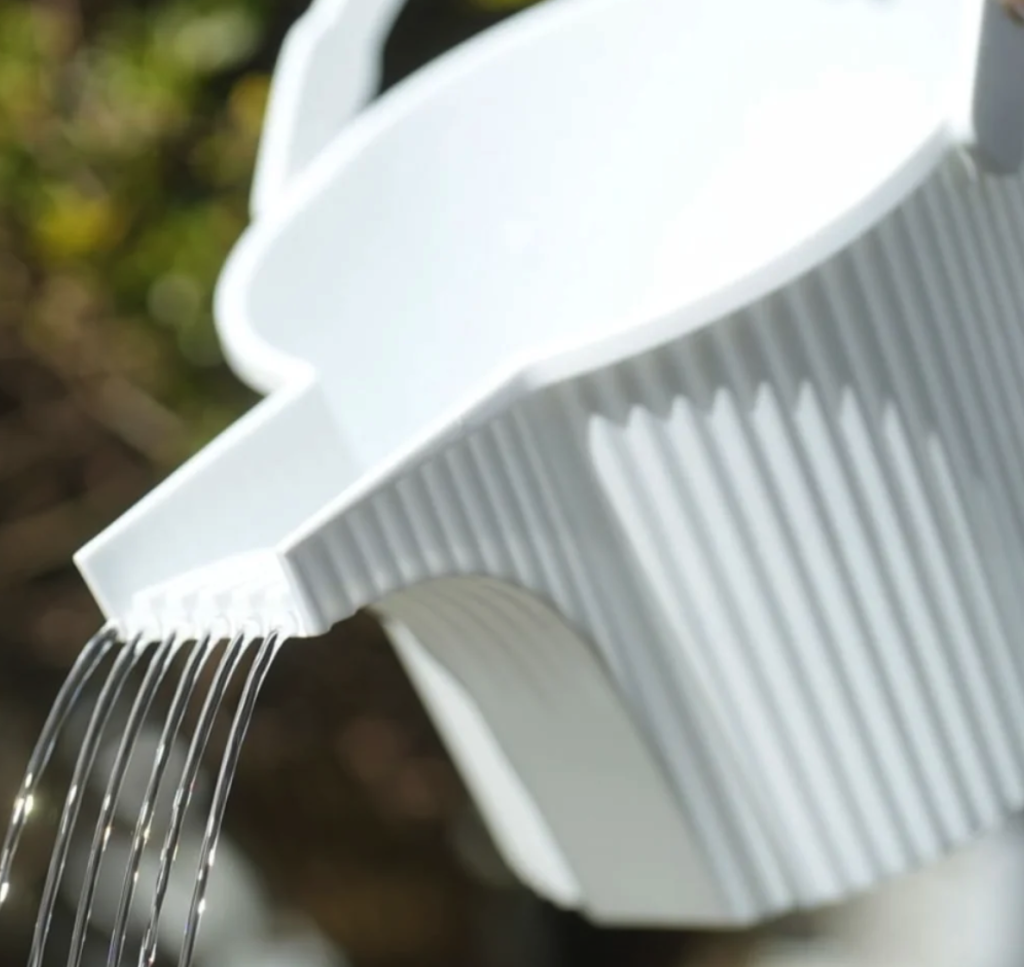
    The rose creates a soft shower-like spray, ideal for young seedlings or plants with fragile leaves. It mimics the feel of rainfall, soaking the soil evenly without displacing it. This reduces the chance of root disturbance, something that’s especially important when starting plants from seed.

    When you remove the rose, the water flows directly from the spout in a solid stream. This is helpful when you need to reach deep into pots, deliver water to the base of mature plants, or target root systems more directly.

    This simple switch in function makes a detachable spout a must-have if you grow a variety of plants at different stages of development. It’s one small feature with a big payoff—especially when precision matters.


    In the end, a watering can isn’t just a container. It’s a choice that shapes how you interact with your garden. With the right material, the right size, and the right spout, you’ll spend less time refilling, reduce waste, and water smarter—not harder. For customized gardening advice or help planning a landscaping system that works with your lifestyle, get in touch with Vancouver Landscaping.

  • Small back yard ideas inspired by Japanese modern garden

    Small back yard ideas inspired by Japanese modern garden

    Japanese Garden designed by modern master

    Dreaming of a tranquil and aesthetically pleasing Japanese modern garden in your Vancouver s small backyard, but working with limited space? You’re not alone! Even small backyards can be transformed into serene retreats with thoughtful design and a touch of creativity. Drawing inspiration from both classic Japanese garden principles and budget-friendly landscaping ideas, here are some concepts to consider:

    Embrace Simplicity and Defined Spaces:

    Japanese modern gardens often prioritize clean lines, minimalist aesthetics, and a sense of tranquility. In a small backyard, this means being deliberate with your layout. Consider dividing your space into distinct zones, even if they are small.

    • A small patio or stepping stone path can define a “hardscaped” area. Patio is important part of landscape design. Even budget-friendly DIY versions using simple pavers. Consider using cost-effective options like basic concrete pavers or gravel pathways, reminiscent of the simplicity often found in Japanese gardens. The use of stepping stones as transitions between areas, can also evoke a Japanese garden feel without the expense of a large continuous patio.
    • Create a dedicated planting area. Instead of sprawling flowerbeds, think about defined planting beds that showcase a curated selection of plants. This aligns with the Japanese aesthetic of highlighting individual elements.
    Japanese garden water feature

    Introduce Natural Elements:

    Japanese gardens emphasize the beauty of nature. Even on a budget, you can incorporate key natural elements:

    • Stones: Rocks are fundamental to Japanese gardens. You can incorporate larger stones as focal points or use smaller gravel to create pathways or ground cover in designated areas, similar to the decomposed granite suggested as a budget-friendly option for a fire pit area.
    • Water Feature (Optional, Budget-Dependent): While elaborate ponds might be costly, even a small container water feature can add a soothing element.
    • Plants: Choose plants that evoke a Japanese feel, such as maples, ferns, bamboo (consider clumping varieties for small spaces), and moss (which can thrive in Vancouver’s climate). The “Epic Gardening” video emphasizes maximizing planting even in small spaces. You can apply the concept of intensive planting with carefully selected species to create a lush yet controlled look.

    Verticality for Small Spaces:

    To maximize space in a small backyard, consider incorporating vertical elements:

    • Vertical Planting: Growing vertically is perfect for maximizing plant in small spaces. This principle can be adapted for aesthetic purposes by using trellises for climbing plants or creating tiered planters to showcase different plant varieties.
    • Screens or Fencing: Consider using bamboo screens or simple wooden fencing to create visual separation and a sense of enclosure, common in Japanese gardens. Painting an existing fence a dark, neutral color like black, can also create a more sophisticated backdrop.
    japanese rock garden designed by Benwell landscape

    Budget-Friendly Hardscaping and DIY:

    Achieving a Japanese modern garden look doesn’t have to break the bank. The provided sources offer several budget-conscious hardscaping tips:

    • DIY Patios and Paths: Laying your own paver patio or creating stepping stone paths is a significant cost-saver.
    • Utilize Affordable Materials: Consider using less expensive paver options or decomposed granite for certain areas.
    • Repurpose and Upcycle: Think about using natural materials found locally or repurposing existing elements in your backyard.

    Enhance with Subtle Details:

    The details can truly elevate your small Japanese modern garden:

    • Outdoor Furniture: Choose simple, low-profile outdoor furniture in natural materials or neutral colors.
    • Lighting: Soft, subtle lighting can enhance the ambiance of your garden, especially in the evenings. Consider solar-powered lanterns or string lights.
    • Ornamental Elements: Incorporate a few carefully chosen decorative elements, such as a stone lantern or a simple water bowl.

    Drawing Inspiration from Japanese Garden Design Principles:

    While focusing on budget-friendly approaches, keep in mind some core principles of Japanese garden design:

    • Miniaturization: Representing larger landscapes in a smaller space.
    • Balance and Harmony: Creating a sense of equilibrium through the arrangement of elements.
    • Borrowed Scenery (“Shakkei”): Incorporating views beyond your garden boundaries.
    • Asymmetry: Avoiding rigid symmetry for a more natural feel.

    By combining these principles with the practical, budget-friendly tips from the sources, you can transform your small Vancouver backyard into a tranquil and visually appealing Japanese modern garden that you can enjoy for years to come. Remember to consider the specific characteristics of your space and choose elements that resonate with your personal style.

  • Landscaping Edging and Its Cheap? Yes, It Can Be!

    Landscaping Edging and Its Cheap? Yes, It Can Be!

    Want to give your landscaping edging a sharp, defined look without breaking the bank?

    You’re in the right place! Landscape edging is a fantastic way to enhance your curb appeal, separate your lawn from your garden beds, and even help manage weeds. Ou r garden’s looks has been elevated by proper edging techinique. The best part? Achieving a professional-looking edge doesn’t have to cost a fortune. Let’s dive into some cheap and effective ways to tackle landscaping edging.

    Why Bother with Edging?

    Before we get into the “cheap” part, let’s quickly recap why edging is a valuable addition to your landscape:

    • Creates Definition: Edging clearly defines the boundaries between your lawn, garden beds, walkways, and other landscape features. This instantly provides a cleaner and more organized appearance.
    • Prevents Grass Encroachment: A well-defined edge acts as a barrier, helping to keep grass from growing into your carefully cultivated flower beds or mulched areas.
    • Enhances Curb Appeal: Crisp, clean edges contribute significantly to the overall aesthetic of your property, boosting its curb appeal.
    • Aids in Mulch Retention: Edging can help keep mulch within your garden beds, preventing it from spilling onto the lawn.

    Cheap and Easy DIY Edging Techniques

    Now for the part you’ve been waiting for – how to achieve great landscaping edges without spending a lot of money. The good news is, one of the most effective and cheapest methods involves a little elbow grease and some basic tools you might already own.

    • Creating a Natural Cut Edge: This is perhaps the most budget-friendly approach. It involves creating a clean, vertical cut between your lawn and garden bed using an edging tool or a half-moon edger.
      • Planning Your Lines: Before you start cutting, visualize or mark the desired shape of your garden bed. For organic curves, a garden hose works wonderfully as a flexible guide. Simply lay it on the ground in the shape you want. For straight lines, use landscape stakes and string to ensure evenness. Run the string tightly between the stakes to create a straight guideline. You can even use spray paint to mark these lines on the ground for better visibility.
      • Cutting the Edge: Once your lines are marked, use your edging tool to make a vertical cut about four inches deep into the soil along your marked line. For a more effective barrier against grass, taper back your garden bed on about a 45-degree angle. This creates a small trench that helps contain mulch and discourages grass roots from spreading into the bed.
      • Cleaning Up: After cutting the edge, rake back any mulch that may have spilled over. You can then clean up the edge of the lawn by trimming any overhanging grass. Some even find it helpful to flip their string trimmer upside down to neatly trim the edge, ensuring the clippings are directed away from you.
      • Maintenance: The beauty of a natural cut edge is its ease of maintenance. You’ll likely need to redefine the edge a couple of times a year to keep it crisp.

    Considering Other Affordable Options

    While a natural cut edge is incredibly cost-effective, you might be considering other budget-friendly materials:

    • Repurposed Materials: Get creative! You might have materials lying around that can serve as edging. Think about using old bricks, stones you’ve found, or even treated wood scraps (ensure they are safe for soil contact). While the sources don’t specifically detail these as “cheap” options, utilizing existing materials can certainly save money.
    • Budget-Friendly Plastic Edging: The sources mention plastic edging. While it can provide a physical barrier, be aware that cheaper plastic edging might not last as long and can sometimes shift or require more maintenance over time. One source even advises getting “the good stuff the first time” rather than a generic brand that might crease or not lay flat.

    Tips for Successful and Cheap Edging

    • Plan Your Project: Before you start any edging project, take some time to plan your layout. This will help you determine the amount of edging you need and the best approach for your yard.
    • Use the Right Tools: While you don’t need expensive equipment, having the right basic tools like an edging tool or half-moon edger, a shovel, and potentially a hose or string will make the job much easier.
    • Time it Right: According to one source, spring is the ideal time for edging as the soil is softer, making digging easier. Early fall is also a good option. Avoid edging in the hard, dry soil of summer if possible.
    • Consider Mulch: After creating your edge, adding a layer of mulch to your garden beds not only looks great but also helps suppress weeds.

    In Conclusion

    Landscaping edging doesn’t have to be an expensive endeavor. By utilizing simple techniques like creating a natural cut edge and potentially repurposing materials, you can achieve a well-defined and attractive landscape without breaking the bank. A little effort can go a long way in enhancing the beauty and organization of your Vancouver property!